To enable the integration, you’ll need to have admin access to Planday and make sure you complete Step 1 before moving on to Step 2.
Step 1 - Planday
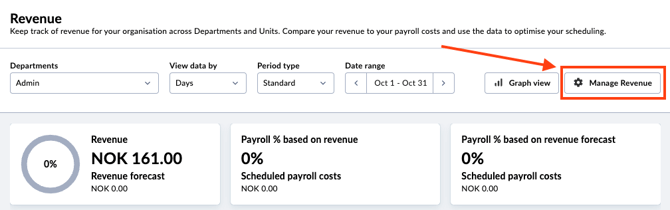
- In Planday, go to Reports –> Revenue -> Manage Revenue.
- Here you can create a Revenue Unit by clicking Create Unit. If you don't know what a Revenue Unit is, follow this guide to learn more.
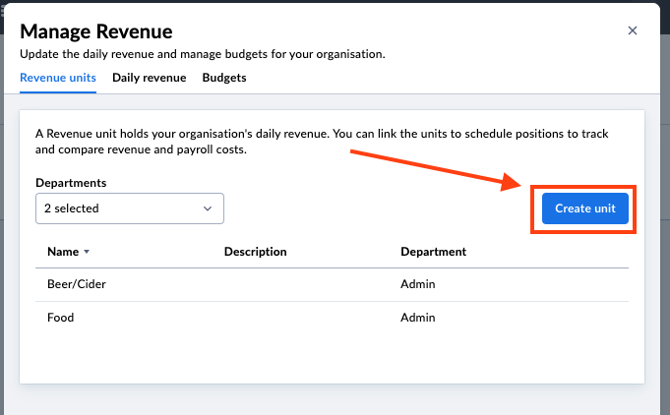
- Name your unit and choose which department it's connected to.
If you're unable to create a Revenue unit in Planday, ensure that you have the correct access. Please contact your local Planday administrator or Planday support for assistance.
Step 2 - Favrit
- Ensure that you have a Tax group set up, if not, please follow this guide
- If Tax groups are set up - go to Company Settings – Integration, scroll down and select Planday.
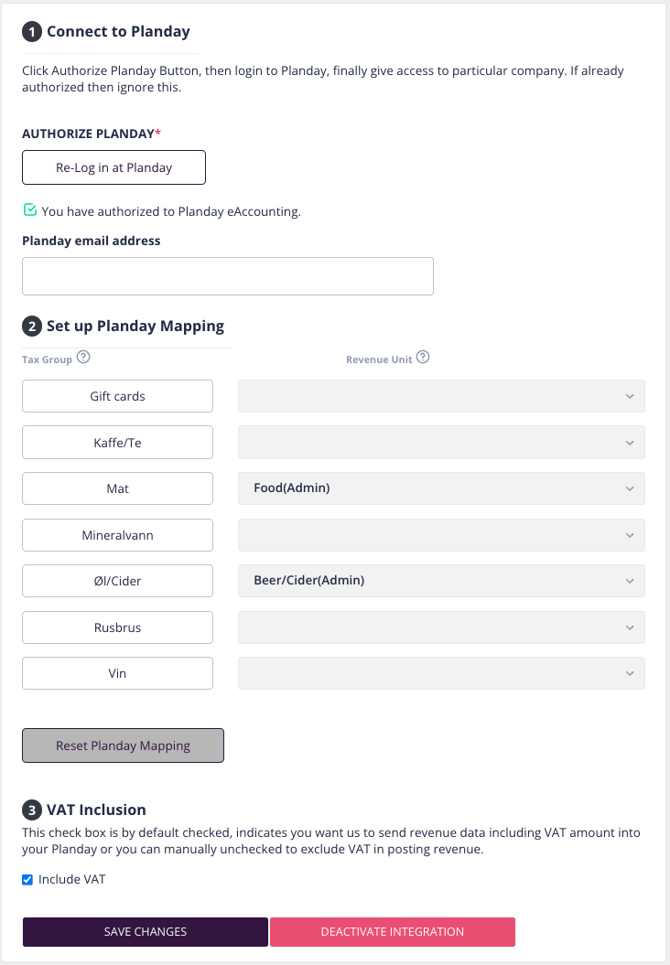
- Click on “Log in at Planday” - you will be redirected to the Planday login page. Follow the instructions provided.
- Type in the Planday portal (e.g. xxxx.planday.com) that you want to enable the integration for, and make sure to authorize it.
- Back in Favrit, you will now see a table for Product groups and Revenue units. Map these accordingly.
- Remember to toggle the Activate Integration button and click Save
- The first sync will occur the day after you've completed the setup.
Good to know
Historical revenue can't be imported
- The integration only transfers revenue from the day it's activated and onwards
- Revenue from before the integration was set up can't be imported into Planday
Choose whether revenue includes VAT
- You can configure whether revenue is transferred to Planday with or without VAT under Admin > Company Settings > Integration > Planday
- If the figures in Planday don't look as expected, check this setting to confirm whether they include VAT
Troubleshooting
Syncs fail with "Missing Planday mapping"
- This error means the Revenue Units in Planday don't match the Tax groups in Favrit
- Make sure you have created a Revenue Unit in Planday that corresponds to each Tax group in Favrit
- Check that Product groups and Revenue units are mapped correctly in Favrit under Company Settings – Integration
Switching to a new Planday account
- If you move to a new Planday account, the previous integration must be closed and a new one connected
- Go to Company Settings – Integration, select Planday, and complete the login and authorization steps again for the new account