
This is a piloting feature. Let us know if you are interested in testing this before we launch it to all customers.
What can I use price templates for?
| Use case | Example |
|---|---|
| Lower prices at quiet times | 20% off coffee on weekdays from 14:00 to 16:00 to bring in more guests |
| Lower prices on a staff menu | A separate menu where staff pay less for food |
| Higher prices at busy times | Burgers cost 20 kr more on weekends after 22:00 |
| Holiday and seasonal prices | Special prices for Christmas or 17th of May |
| Higher prices for delivery partners | 20% higher prices on the menu you use for Wolt and Foodora |
How price templates work
- A price template sets a new price on the product. It is not a discount, so discounts in ePOS are applied on top.
- A template raises or lowers the default price by a percentage or an amount in kr, at all times or in a set period.
- Only the default price changes. Prices in option groups and customization groups are added on top as usual.
- Both the Eat in price and the Takeaway price change. Prices are rounded to whole kroner.
- For open bills, the price is set when the product is added to the order, even if the guest pays after the period ends.
- For example, if a lunch offer ends at 14:00 and a product is added at 13:45, the guest pays the offer price, even if they pay at 14:15.
Create a price template
- In Admin, go to Menu Builder → Settings.
- Scroll down to Price templates, and click Create template.
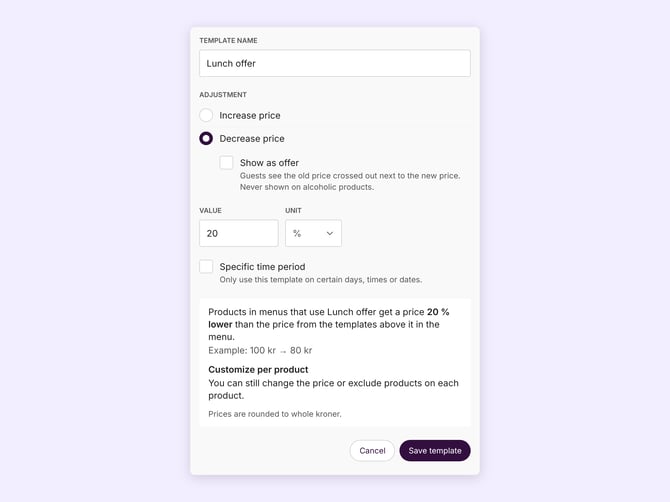
- Enter a Template name, for example "Lunch offer" or "Christmas prices".
- Choose Increase price or Decrease price.
- Enter a Value, and choose % or kr as the Unit.
- To limit when the template applies, select Specific time period. See "Set when the template applies" below.
- Click Save template.
Show the discount to guests
When you decrease a price, you can select Show as offer. Guests then see the old price crossed out next to the new price. This is never shown on alcoholic products.
Set when the template applies
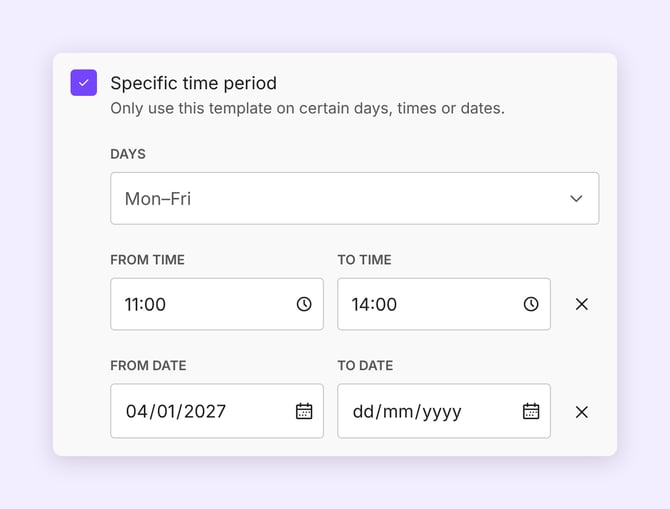
When you select Specific time period, you can choose:
- Days: for example every day, weekdays or weekends.
- Time: Click Add hours, and enter From time and To time, for example 11:00 to 14:00. The time period can go past midnight, for example 22:00 to 02:00.
- Dates: Click Add dates, and enter From date and To date, for example 1 December to 24 December. You can leave the To date empty if the template should apply until you change it.
Outside the time period, the default price is used.
Add a price template to a menu
- In Menu Builder → Settings, scroll down to Menus.
- Open the menu you want to change under All menus.
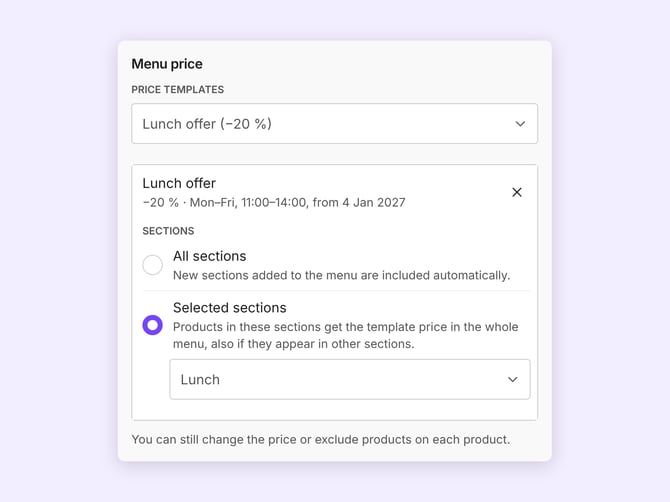
- Under Menu price, select one or more templates in Price templates.
- Choose which sections the template applies to:
- All sections: the template applies to the whole menu, including sections you add later.
- Selected sections: choose the sections the template applies to, for example only "Lunch".
- Click Save changes.
Exclude a product or set a custom price
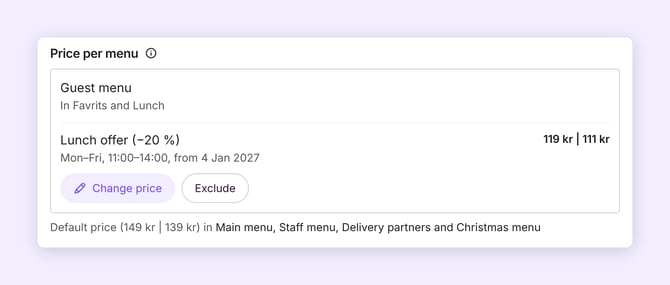
You can adjust the template price on each product.
- Open the product.
- Go to Price per menu.
- Do one of the following:
- Click Exclude to keep the default price on this product.
- Click Change price to set a custom price. For example, if 10% off gives 101 kr, change it to 99 kr.
To go back to the template price, click Reset to template.
Use a separate menu with its own prices
You can have several menus, each with its own price templates. This is useful for a staff menu, a takeaway menu or a Christmas menu, and you do not need to create duplicate products.
- In Menu Builder → Settings, scroll to Menus.
- Under Default menus, choose which menu is Active in ePOS and which menu is Active in guest app.
- To share another menu, open it under All menus and turn on Available for guest app. Only people you share the URL with can open it.
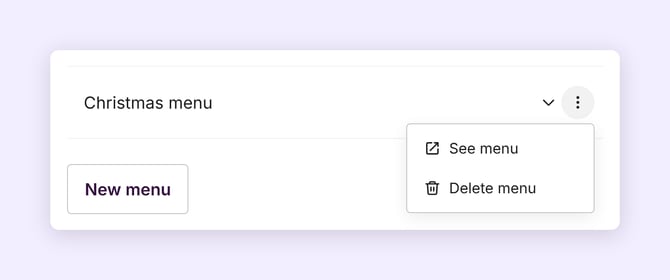
- Click the three dots on the menu, then See menu.
- Copy the URL that opens, and share it with the people who should use the menu. You can also use the link for a QR code.
Only guests with the link or QR code can open that menu. For example, share the staff menu URL only with your staff, or post the takeaway menu URL on social media.
Use several price templates on the same menu
When a menu has several price templates, all active templates apply, from the top down. Each template changes the price from the template above it. Drag the templates to change the order.
For example, a burger costs 100 kr, and the menu has two templates:
- Christmas prices: +30 kr, 1 December to 24 December
- Lunch offer: 50% off, weekdays 11:00 to 14:00
In December, the burger costs 65 kr during the lunch offer (100 kr + 30 kr, then 50% off), and 130 kr at all other times.
The order matters.
With Lunch offer at the top, the lunch price is 80 kr instead (50% off 100 kr, then + 30 kr).
How price templates show in reports
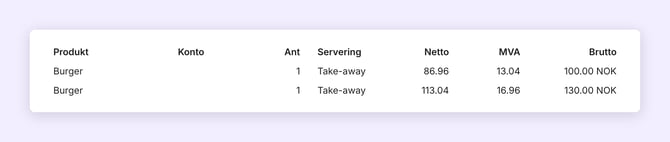
Products sold with a price template show as a separate line in Reports.
Products shared through micronetwork
Price templates do not apply to sections shared from other locations. These products keep the prices set by the location that shares them. When a section is shared, the sharing location can choose which menu the prices come from in Use prices from menu.